
Here's a pretty chair that has made the rounds.
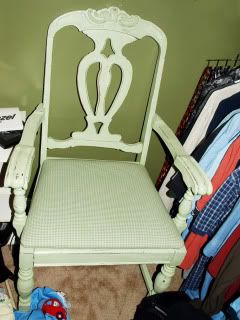


It was originally part of a set that my mom bought for our dining room when I was a young teenager. She found them in the classifieds section of our local paper.
They served us find for years. My mom eventually bought a new dining set right around the time that I got my first apartment, so the old dining set (a 70s table and 5 redone antique chairs) came with me. Shabby Chic was just become the thing at the time, so I remade the chairs with distressed minty green paint and softly colored plaid seats.
Eventually I bought a new dining set, so the table and 4 of the chairs went in a garage sale. But I kept this captains chair (the other 4 were armless). I use it primarily at my crafting/sewing work table. It still sports the paint scheme I gave it 13ish years ago.
I gotta say, I'm pleased it's not that out-of-date. It still looks ok to me. But my tastes are changing slightly. I still like time-worn finishes, but I like bolder and more modern things too. So it's time for a makeover.
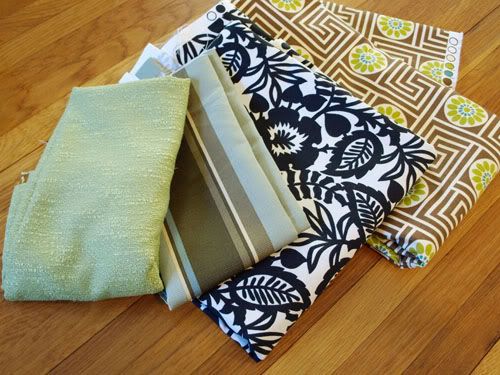
True confessions time. I bought too much black and white fabric.

I only needed 3 1/3 yards for my ottoman makeover. I was nervous about that project and bought 5 yards. Normally I'd pick out a new fabric for this chair, but the cheap side of me is just going to use what I already have. I'm sure it will be fine, it will just be a little more matchy-matchy than I originally wanted.
(channeling my kids' whiney voice) But I don't like match-matchy.
I'm trying to get over it.
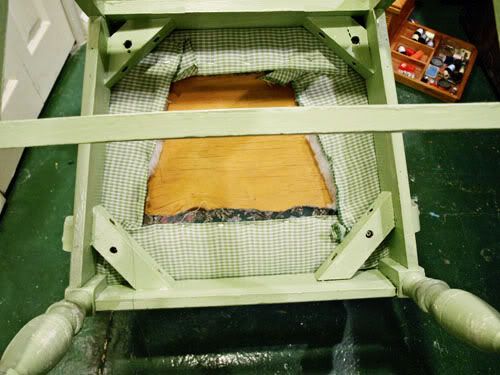
Have you ever recovered a chair with a fabric seat? Don't be intimidated. It's super easy. Flip the chair over. You'll see 4 screws.

See the black dots in the cross braces? Those are the screws.
Take out the screws, and the seat will pop right out.
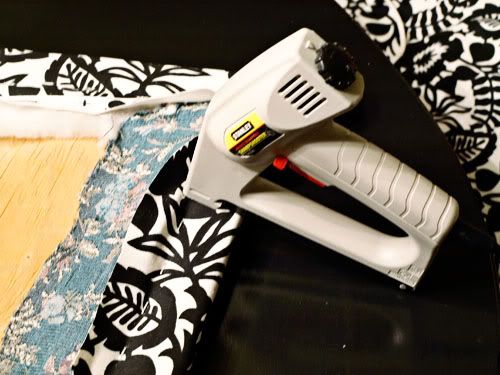
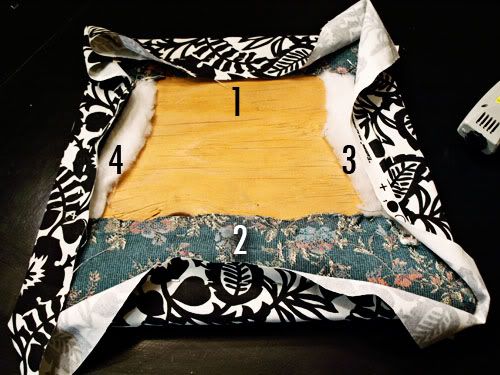
Cut out a piece of fabric large enough to wrap around the back.

You'll be wrapping the fabric around the back and stapling it.

I alternate opposite sides when stapling. For instance, I'll do a row of staples across the top, then I'll staple the bottom (while holding the fabric taught). Then a row across the left side, then the right (stretching fabric taught again).

Alternate sides when stapling.
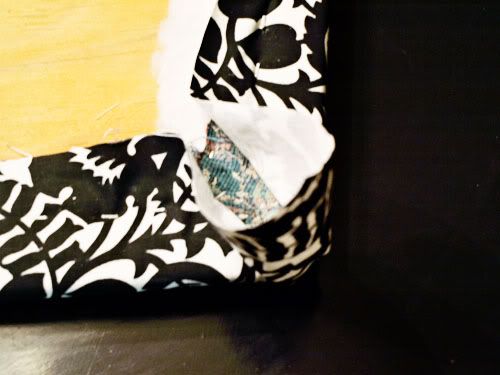
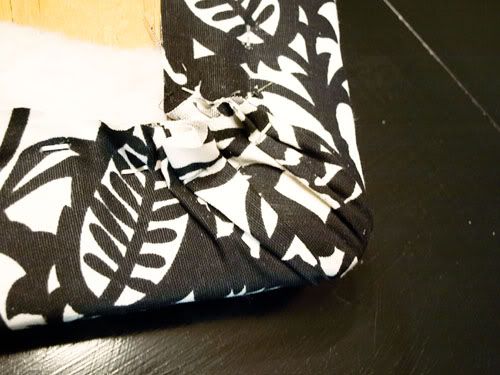
Leave corners for last.


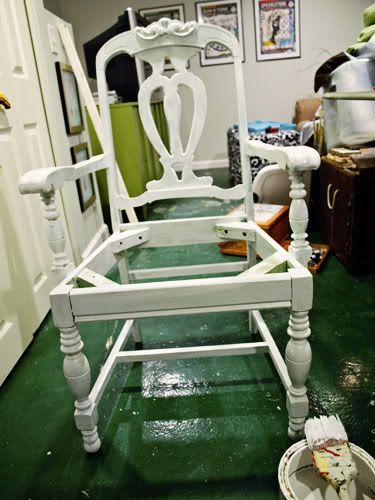
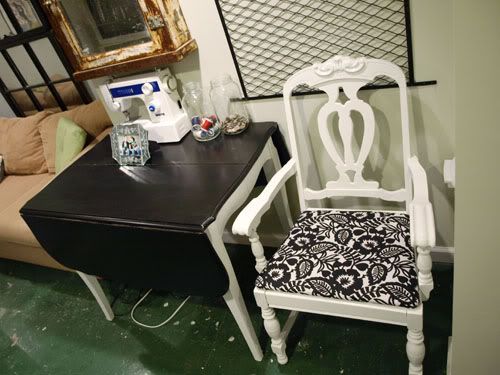
When you're finished, just screw the seat back in. A couple coats of white semi gloss finish off this chair makeover.

Before:
After:

Did you notice my work table got a makeover too? More on that tomorrow.
In the meantime, linking to some of these great parties.
Now go make something!
your chair turned out darling! I love your fabric choice! So cute!!!
ReplyDelete-emily
nestnestingnested.blogspot
Love the chair!
ReplyDeleteCan I ask you a question? What kind of staple gun is that? I've been considering getting one. Is it just an "everyday" staple gun or something special for fabric, etc.?
Thanks!
Tammy : )
I love teh black and white print. It looks so elegant and chic.
ReplyDeletemegan
craftycpa.blogspot.com
Great tutorial. I love the fabric. I am your latest follower. I would love for you to come and check out my blog and follow me back at www.diybydesign.blogspot.com. Thanks so much.
ReplyDeleteSure Tammy. The staple gun is a regular, run of the mill staple gun. It's a Stanley TRE500. http://www.stanleytools.com/default.asp?TYPE=PRODUCT&CATEGORY=HT_CONS_FAST&PARTNUMBER=TRE500
ReplyDeleteI was going to add, we have some non-electric staple guns too. They work just fine also, except it's a little bit harder to pull the "trigger".
ReplyDeleteLooks great! Thanks for the tips on recovering the chair~I'm doing my first tomorrow!
ReplyDeleteSo cute! Love the fabric.
ReplyDeleteLOVE this!!!
ReplyDeletem ^..^
I love a good chaiR!!
ReplyDeletegreat job
visit me
chickhardware.blogspot.com
Your chair turned out great
ReplyDeleteI love the black and white fabric
Love the material, you did a great job!
ReplyDeleteI am working on a black and white room right now, so I definitely approve your choice of fabric. Good work!
ReplyDeleteWhat a great makeover. The fabric is perfect. Just amazing what fabric and paint can do.
ReplyDelete