Several years ago I asked Mr. RBR for a jewelry box for Christmas. I'm usually not extremely picky and didn't feel the need to pick it out myself, but I did ask that it be 1. large (larger than the one I had at the time) 2. Be white 3. Have silver hardware.
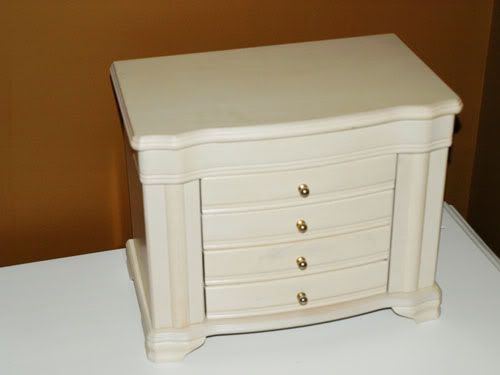
Mr. RBR found this.
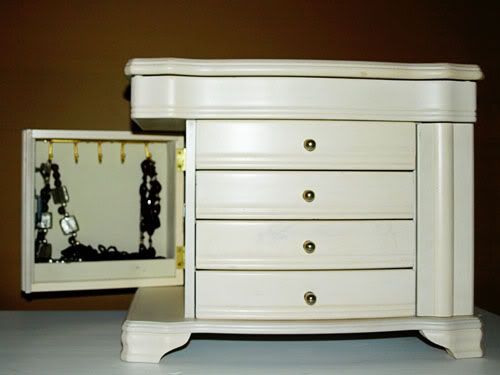
It's not tooooo bad. The size and functionality of it I love. It's worked well. But I've never loved the finish.
Mr. RBR said he looked everywhere, but couldn't find something that was large and white, let alone with silver hardware. This finish is kind of halfway between cream and pickled oak. You can't really tell in the photos, but there's a pickish hue and some wood grain showing. And the brass just didn't go with our bedroom decor.
But now that our bedroom is getting a refresher, why not change it?
I started with some spray paint. Just give it a light sand and paint away. The drawers on this jewelry box shut pretty tight, so I didn't even bother to take my jewelry out.
Don't be like me.
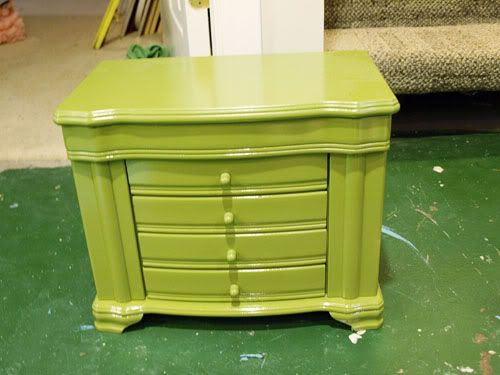
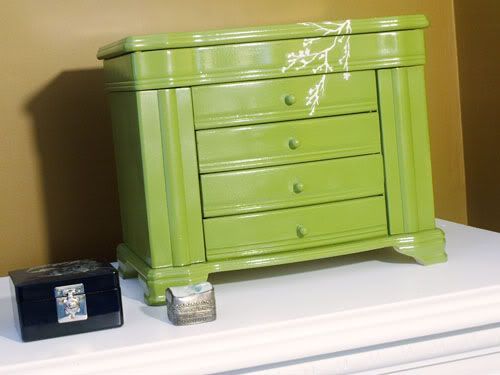
Here's what it looked like after 3ish coats with some spray paint. I liked it. I thought it looked nice!
But why not take it over the top? I decided to put a little handmade detail on it. Something branchy. I got me some spring fevah! I got a large artist's brush and practiced on some scrap paper.
Uh oh. I might be in trouble. That sucks.
To the internet for some inspiration!
Um, yeah. Something like THIS!
This is wallpaper by Schumacher, found here.
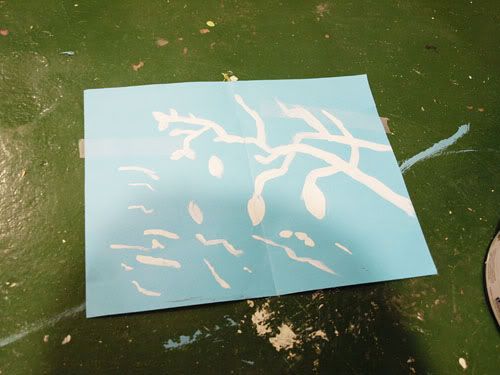
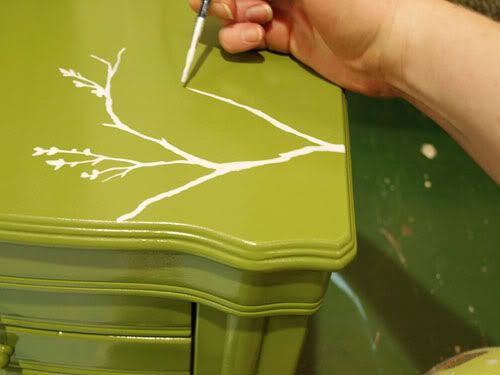
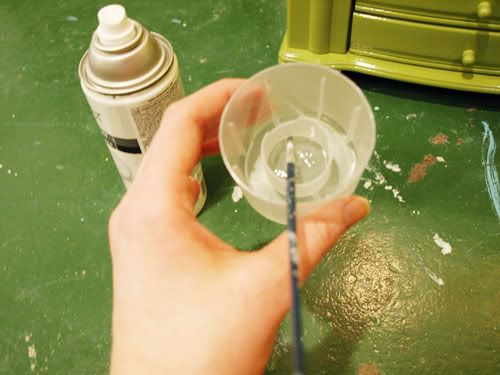
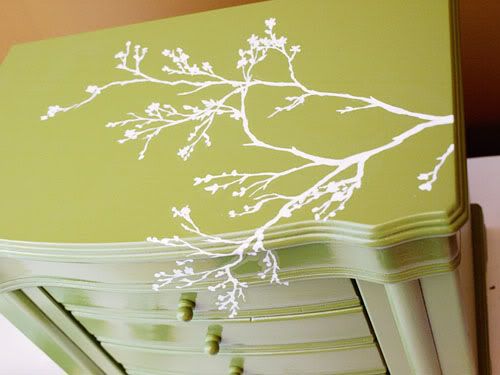
So I printed out the inspiration on my home printer. I got out a teensy tiny artist's brush and some regular white semi gloss trim paint. I found the paint was a little too thick and clumpy to get the small detail, so I added a few drops of water right on the paint lid. Then I just went for it!
It was a little scary, but I figured if I hated it, all I needed to do was re-sand and re-spray. No big deal. Luckily it turned out very nice! It's not hard. Give it a try! Find some inspiration. Practice before you paint your piece. Go slowly--take your time!
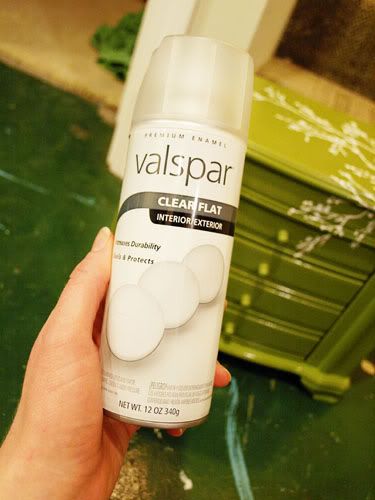
When it was dry I wanted to make sure to protect my hard work. The spray paint seemed very durable, but I didn't want my branches to scrape off. I found some matte protective spray I already had (I used it to protect the chippy finish on the dump truck and train in the boy's room). I didn't want to spray the whole jewelry box in this case, because the sealer is matte and the spray paint was gloss. I was pretty sure that would rip a hole in the universe.
Nah, I liked the gloss, and I didn't want to cover it with matte. If I had gloss spray sealer, I would have sprayed the whole thing. Instead I sprayed a little matte sealer right in the cap. Stuck my brush in there and painted over top all the white areas I wanted to protect. After I was finished I immediately cleaned my brush with mineral spirits so it stayed nice.
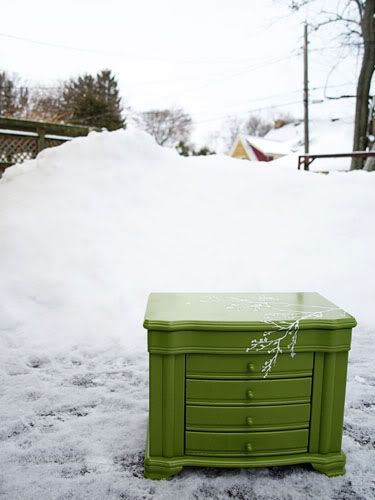
All done! Here it is in its new home.
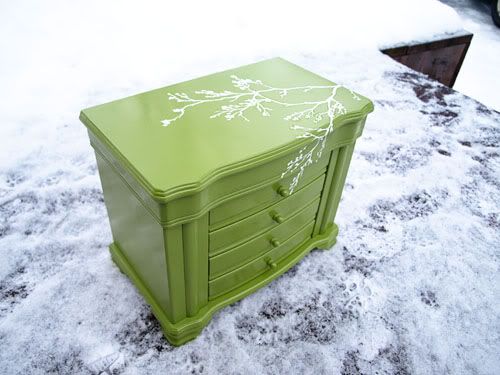
You think if I brought it outside it might inspire spring to come sooner?
Hmm... Not working.
It's still pretty. One more before and after.
Linking to some of these great parties!
This project was featured on the CSI Project.



love the branches-your first attempt was too funny. great idea about the sealer!
ReplyDeleteReally cute! I love the bright green color. Makes it so fun looking!!
ReplyDeletePS- I'm doing my first ever giveaway on my blog and I'd love for you to come enter! http://mygirlishwhims.blogspot.com/2011/02/my-first-giveaway-and-introducing-your.html
What a cute transformation. What a cute idea. I'm your newest follower. I would love it if you linked your project up to my link party.
ReplyDeleteMore The Merrier Monday.
http://diyhshp.blogspot.com
cute jewelry box love the green..
ReplyDeleteA really great makeover. I love the fresh new colour and the extra detail. Very pretty.
ReplyDeleteI LOVE this! You did an excellent job and now I NEED to paint my jewelry box the same color. I am working on redoing my bedroom in blues and greens. I wouldn't have believed the branch design was free hand unless you specifically said it.
ReplyDeleteThat is so cute, love the green!!
ReplyDeleteAgatha at audistree.blogspot.com
So pretty! I love the green and the painted branches do take it over the top. I am so impressed that you freehanded them! As for leaving the jewelry in the box, that sounds like something I would do and totally pay the price for. My shortcuts are never short but I'm glad yours was! Beautiful!
ReplyDeletejust gorgeous. I love that color and the branches are genius!
ReplyDeletemegan
craftycpa.blogspot.com
Very cute! You did a great job on the branches! Love the color, too. So fun! I wish spring would come, too!!! :)
ReplyDeleteI'm having TWO giveaways right now--love it if you could check them out! alittleknickknack.blogspot.com
LOVE the color you chose! Looks great! Just came across your blog and I'm a new follower.
ReplyDeleteThat is so cute and so are your kids! I love the name Delaney! JenT
ReplyDeletesooo much more fun in the green! and i love the design you painted on it- it looks wonderful!
ReplyDeleteHow cute! You did a beautiful job on it. It looks very pretty. Thanks for sharing.
ReplyDeleteThis is a great little make-over and I love the shots of it in the snow. I hope it works I am ready for spring too.
ReplyDeleteTraci
SO pretty! I love green :) I would love for you to link up to my Ten Buck Tuesday link parties!
ReplyDeleteWhat a transformation! Love it! The handpainted detail is what really gives it that WOW factor.
ReplyDeleteI love it! I always see jewelry boxes at Goodwill and pass them by. Not now, what a great gift idea. I am your newest follower. Come by for a visit to the nest sometime.
ReplyDeleteIt looks great! So pretty. I love your blog too.
ReplyDeleteI love it! I wonder if I could do that with my brown jewelry box....great job!
ReplyDeletewww.decoratingdiy.blogspot.com
gorgeous!!! I love the branch... I hope you will share this over at the Project Party Weekend! http://www.bubblynaturecreations.com/2011/03/project-party-weekend-5-ways-to-re.html
ReplyDeletelove this! I nominated you for an award! krazycrafylady.blogspot.com and I am now following you :)
ReplyDeleteAmazing! I love this also. I have a similar jewelry chest, I might just have to try this. I think I was drawn to the green in both of your projects when I clicked the thumbnails - LOL
ReplyDeleteLink this up also! :)
Jenn - greendoordesigns.blogspot.com
that is so cute. I love green!!
ReplyDeleteLove the stencil on top - it's the perfect touch!
ReplyDeleteHoping over from CSI:
ReplyDeleteGorgeous! I LOVE the green color and the a.maz.ing stenciling on top. So in the mood for spring :)
This turned out so well! Such a pretty color & amazingly detailed painting!
ReplyDelete-caroline
http://cwfrosting.blogspot.com
Love this - I have a box that looks just like this. I was going to give it up at my recent housewares swap but am so glad I didn't now!
ReplyDeleteYour projects are great - you have a great eye!
LOVE! The color and painting are just perfect...absolutely love it!
ReplyDeleteI have the same jewelry box, in an "oak"ish color. Never even thought about painting it. I might just have to give it a try! Thanks for the inspiration
ReplyDeleteValerie
www.occasionallycrafty.blogspot.com
You are not afraid of painting - LOVE it! The branches you painted look professional. Very nice.
ReplyDeleteNewest follower! :)
Jewelry Cabinet.. So nice
ReplyDeleteThe uniqueness of this box relies on its painting, I really like it and it's a good idea to apply on some other things.
ReplyDeletesend gifts to pakistan
I like how you just went in for it! For those kinds of DIY paint jobs, I usually have my brother do the finish since he's better with the brush and all. You did a marvelous job, however! Where in the world did MR. RBR find that kind of jewelry box?
ReplyDelete- Bridget Rossi
Nice jewelry boxes with an awesome design above that, looking too dashing....
ReplyDeleteI have Asian Jewelry Boxes and I love its design as well..
I featured your jewelry box feature in a post at SheekGeek: http://sheekgeek.org/2013/jessicasheekgeek/jewerlyboxmakeoverideas
ReplyDelete